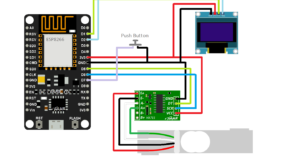
ESP8266 :
ESP8266 is advance WiFi chip with complete and standalone networking capabilities. This can be use ether as a standalone or the slave to a host microcontroller. ESP8266 is integrated with advance Tensilica’s L106 diamond series 32 bit micro-processor and on-chip SRAM with CPU clock speed 80MHz. We can also interface external input devices with this chip though provided GPIO’s (general purpose input/output).
For detailed information you can download ESP8266 datasheet here.
ESP8266 Modules:
There are several esp8266 modules available in market but only some of them are famous and commonly used. The most commonly used esp modules are ESP-01, ESP-07, ESP-12 & ESP-32. Nowadays ESP-32 is most famous module amongs all of them because ESP-32 is the only version of ESP which combines WiFi and Bluetooth in single module. You can download datasheets of these modules from attachments.
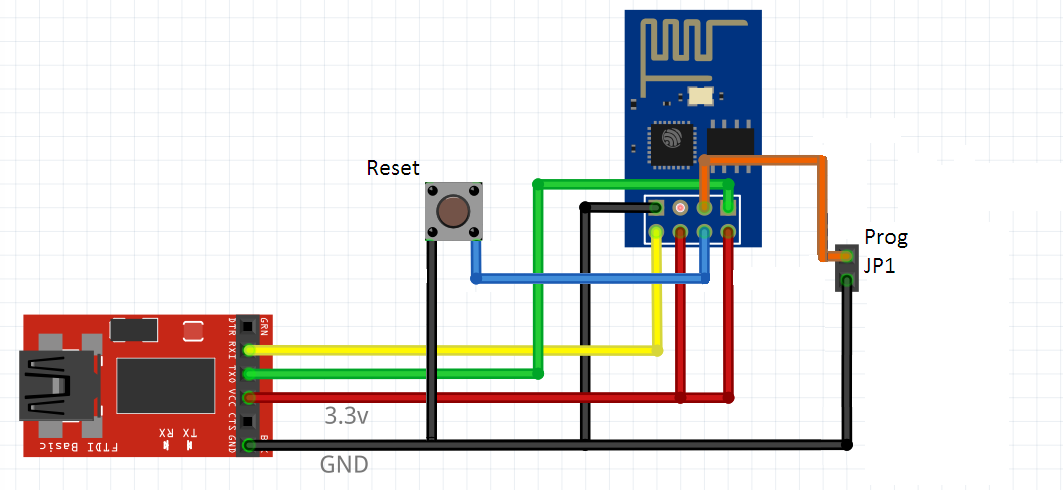
ESP-01 Basic Circuit:
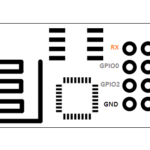
ESP-01 Pinout
How to flash ESP-01 using Flash tools:
- Gather all component shown in above circuit and wire your esp to serial module as shown.
- Download ESP flash download tool from the link given at the bottom of the page. You will not need to install this tool in your system, this tool will run directly without installation.
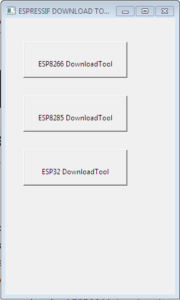
- Extract the rar file which we have downloaded in last step and run application file in it and select ESP8266 form selection buttons.
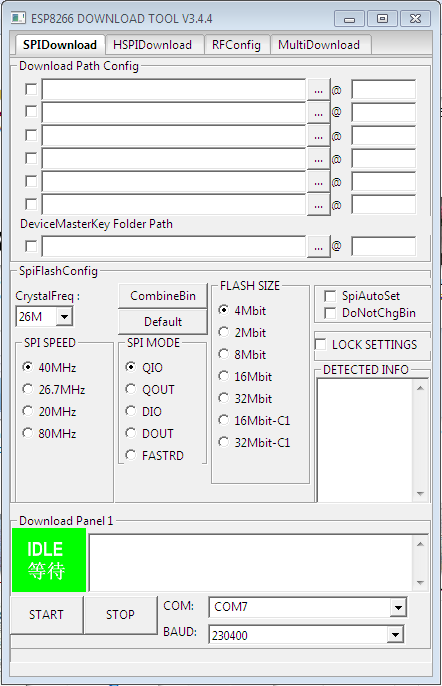
ESP-flash-tools - After selecting ESP8266 download tool button, Flash tool screen will appear like bellow picture.
ESP-flash-tools - Now go back to your circuit and put jumper JP1 on. For setting ESP-01 into programming mode, you have to short GPIO0 to ground terminal of connected source.
- Connect serial module to your computer USB port and check the COM port for this device in device manger. You will need the correct COM port number of the connected device which you want to flash. ( learn how to check COM port )
- That’s it, You are ready to go. Now select the bin files you want to burn into your ESP, select com port at the bottom of the flash tool and hit START. Ongoing process and success message will show in download panel dialog box.
- For beginner level you can burn NodeMCU firmware in your ESP-01 for general use.
How to Flash NodeMCU firmware in ESP-01:
- Download ESP8266 Flasher form the link given bellow at the bottom of this page.
- Run the flasher application file. You will see the tool as shown in bellow picture,
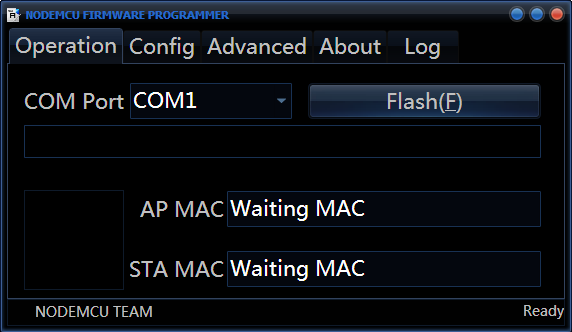
ESP_flasher - Now setup your ESP-01 in programming mode as i described in previous steps. and select the COM port of your serial module.
- Do not change any other settings in flasher, setting right port is enough.
- Now hit Flash button provided just beside com port and your ESP will start receiving data from flasher. At the same time AP MAC and STA MAC will appears on flasher as shown in picture bellow,
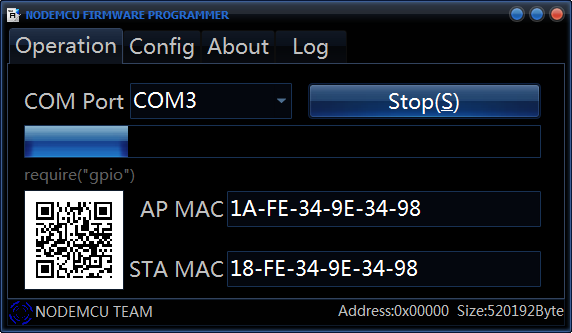
Programming ESP…. - After successfully completing flashing process green indication will appear at the bottom, This means your ESP is programmed successfully and ready to use.
Downloads: