Overview:
SPIFFS is Serial Peripheral Interface Flash File System which is designed for microcontrollers with flash chip, ESP8266 is one of those microcontroller. In this tutorial we will learn how to flash data in ESP8266 filesystem using Arduino IDE plugin.
Using SPIFFS with ESP8266 board you can do several useful things like saving data in file system permanently without using separate memory chip, save html and css file to build a web server, save images and icons for interactive webpage.
Parts Required:
- ESP8266 Node MCU with data cable
- Arduino IDE with latest ESP8266 library
Procedure:
- Install latest Arduino IDE in your computer if it is not installed yet. You can download the latest version from Arduino site directly or from this Link.
- Install latest ESP8266 library into your Arduino IDE. Please follow the link for detailed procedure.
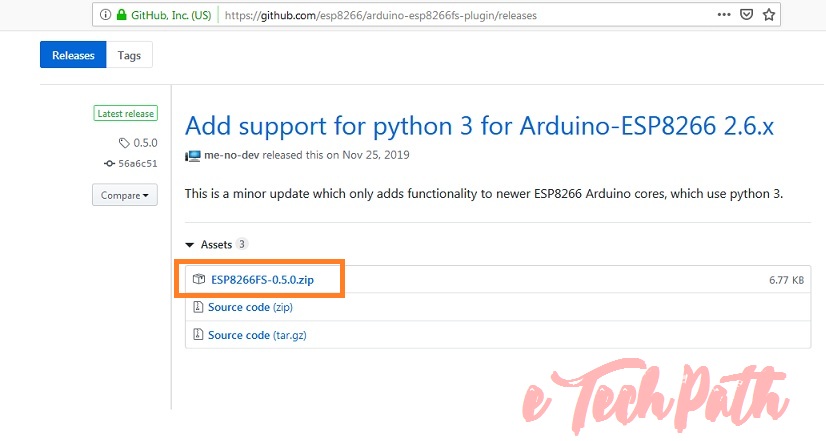
- Go to ESP8266 filesystem download page on github and download filesystem zip file as shown in bellow image, ESP8266FS Link.
- Open Arduino IDE directory and locate tools folder in it. In most of the cases in Windows system your directly will be same as bellow,

- Unzip the downloaded file in tools folder as it is, do not rename or change location of jar file, it should be same as shown in bellow image.
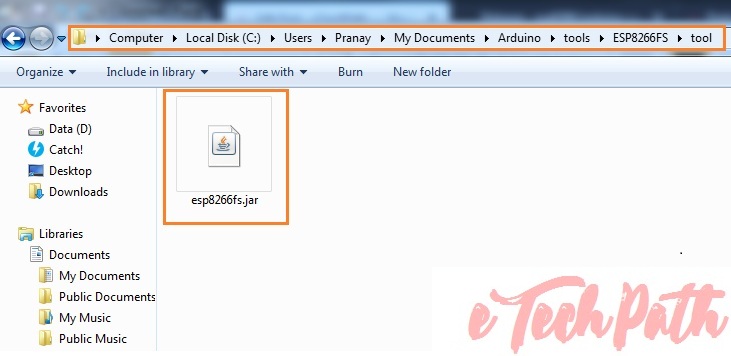
- If you don’t find tools folder under Arduino folder, then make one with correct spell (tools) and paste downloaded unzipped folder in it.
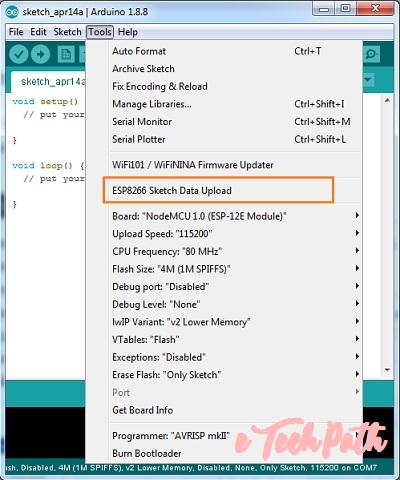
- That’s it, you are ready to go now. Restart your Arduino IDE and check if the plugin was successfully installed. Click on Tools menu in Arduino IDE and check that you have the option ESP8266 Sketch Data Upload in drop-down list.
